

Macarons are a recipe that I've gazed at from time to time dreaming of how adorable they would be on a platter to bring to a party, but I have always been too intimidated to try them. Since I've decided that this year should be a year of adventure, I want to try to get out of my comfort zone with the food that I make as well. It turns out, it wasn't really that hard!
Macarons are time consuming and require a few basic techniques, but they really are not as hard as I had always imagined. And even though a few did not get the perfect little "feet" & I had a few cracked shells, they were still delicious!
I know it seems lot of steps, but give it a try - you will be so glad you did!
Macarons are really versitile, once you get the basic recipe down, you can make up whatever flavor combinations your heart desires. I chose to go with some pretty floral flavors to match the pink and purple for Valentine's Day gifts, but you can just use a bit of just anything you like. The filling is also up to you. I like the buttercream, but you can just add jam, nutella, caramel, lemon curd...the possibilites are endless!
The rose-strawberry and lavender-honey were both really beautiful combinations. They were sweet (lavender honey is definitely a bit sweeter to get that honey flavor), but I think they were both really well balanced with the floral and freshness.

Basic Macaron:
3 large egg whites at room temperature
2/3 cup almond meal or ground almonds
1 1/2 cups powdered sugar
1/4 teaspoon of either rose water or crushed lavender flowers
Food coloring (optional)
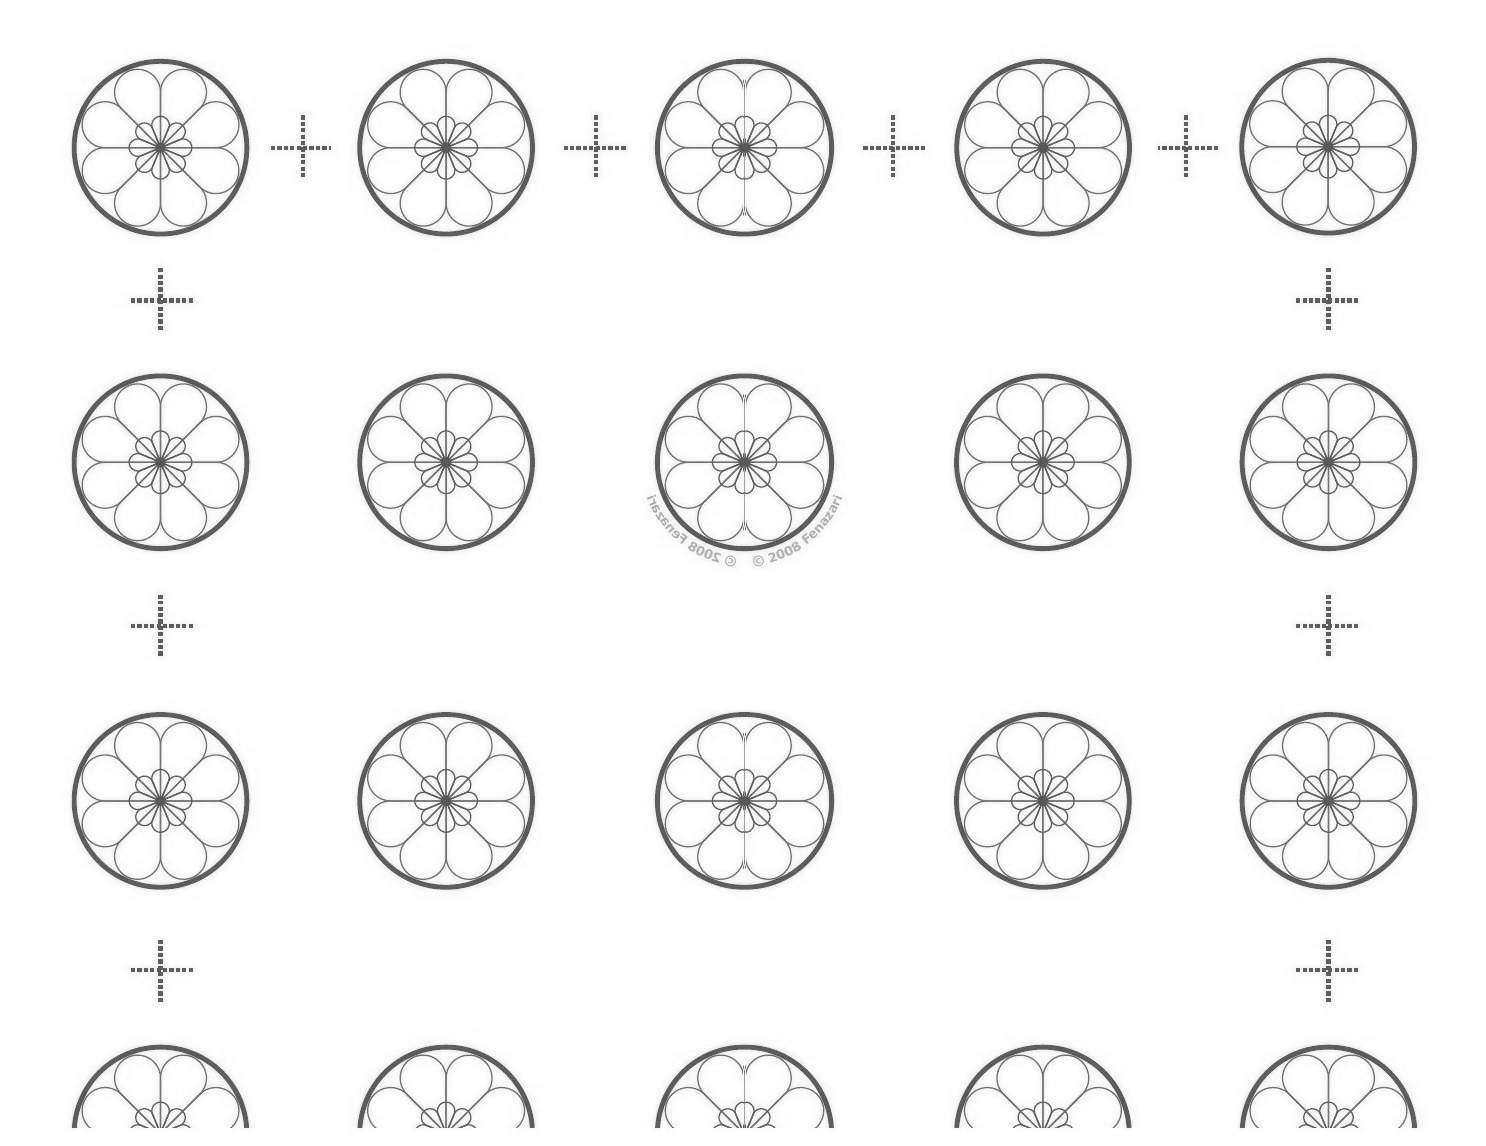
You may also want to print out a guide like this one. It's not necessary but I found it really helpful. You could also just draw circles on the back of the parchment paper.
Directions
1. Preheat the oven to 280º and position two racks in the lower section of the oven. Line two rimmed baking sheets with parchment paper.
2. Sift the almond meal-powdered sugar mixture through a mesh sieve.
Place egg whites in the your mixer bowl begin to beat on medium (Kitchenaid - 4 or 5). When the eggs start getting frothy, gradually add the sugar one tablespoon at a time.
3. Continue to beat the egg white mixture until glossy and stiff peaks form. Add your flavor and color and continue to mix. You want to get a good stiff peak, but be careful not to overmix (your merigue will start to get lumpy if you've overmixed). When you add color, you should make it a little more vivid then you'd like your end result to be because the color will change during baking.

4. This is the hard part: Gently add half of the sifted almond mixture to the meringue. With a gentle hand, fold the mixture together using a spatula. Lift from the bottom and go around the sides and back into the middle, turning the bowl as you go. Once you have those mostly mixed, you can add the other half and keep going. The mixing process is where you want to take your time because it will make or break the macarons. You want to get the mix well incorporated so that it's smooth and gooey, but you do not want to overmix and loose the air of your merigues. The end result will be like molten lava. This will take about 50 fold and look like this:

5. Pour the batter into a pastry bag with a round tip. (Hint: use a big cup or vase to wrap the top of the bag around and hold your bag open as you fill). You could also use a ziploc bag & cut a small hole in the corner.
6. Pipe 1" rounds onto your parchment covered baking sheets.

7. Using just a bit of water, wet your fingertips (be sure there is not too much water because it could cause damage to your macaroon) and you can lightly tap down the peaks that form when piping - this step is optional.
8. Tap your baking sheet hard against the counter 2 or 3 times (don't skip this step, it's important to make those little feet I told you about form). Then let your macarons sit out uncovered for 30 minutes to let a very thin, smooth crust form. You will know they are ready when they no longer stick to your finger when you touch them.

9. Bake for about 15-18 minutes. The exact bake time will depend on your color, your oven, and the size of your macarons, so keep a close eye on them and give them a turn if your oven is a little uneven. They are ready as soon as they no longer stick to the parchment.
10. Let them cool and fill with your choice of filling. They are even better the next day once they have had some time to fully cool and set.
 Basic Buttercream Filling:
1 stick of butter (8 tablespoons) at room temperature
2-3 cups confectioner's sugar, sifted
2 tablespoons of honey -or- 3 tablespoons of strawberry puree (any kind of jam would work too)
Cream butter in the mixer and add flavoring of your choice. Slowly add in sugar and mix until smooth. If your frosting is too thick, you can add milk 1 tablespoon at a time until you get the consistency that you like.


Hey, Sarah!
ReplyDeleteI love your blog and am a new follower :) I can't even begin to describe how impressed I am by your macarons. They are perfect. I tried to make some once, and it was a total disaster! But I think you've inspired me to try again.
Lexie
witandwonder.blogspot.com
Aw, thank you so much Lexie! I hope you do try them again - there is something just so gratifying when you conquer it! They are just so cute and make amazing gifts and then I just felt so proud to make something that I was convinced I would fail at!
DeleteJust found your blog from the chocolate blog hop! These macaroons look sooo yummy! Thanks for sharing! :)
ReplyDelete-Kayla from Love Sparkle Pretty